


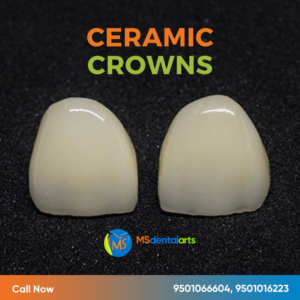
All-ceramic crowns form one of the most aesthetic restorations available today. Crowns without metal frameworks allow light to pass through the crowns and exactly mimic the translucency of natural teeth. Other benefits include biocompatibility and less tooth loss than ceramic-to-metal restorations.
Titanium implants have established longevity.
To be successful, all-ceramic crowns must have a relatively uniform circumferential thickness. This is directly related to the drills used during tooth preparation.
The preparation differences between various all-ceramic crown materials are minimal. They avoid unfavorable stress distribution and minimize the risk of crown fracture.
The preparation of the front teeth must ensure optimal ceramic support along the entire incisal edge. It consists of a reduction on 2 levels of the incisal edges.
The tooth should have sufficient crown structure for optimal strength and retention shape. Ideally, the thickness of this area should not exceed 2mm. Otherwise, all-ceramic restorations are likely to fail.
The preparation of the posterior teeth should include 2-plane reductions on the working cusps (lingual cusps of the maxilla; buccal cusps of the mandible).
Posterior restorations should distribute occlusal loads evenly in the ceramic and be supported by the tooth structure.
For IPS Empress® or e.max® crowns and zirconium crowns in the anterior region, the teeth should be reduced in the range of 1 mm to 1.5 mm to achieve aesthetic restorations. The reduction of the face must be between 1mm and 1mm.
5mm, while the incisal margins should be reduced between 1.5mm and 2mm to ensure sufficient incisal translucency.
The optimal one Tooth preparation should begin with deep fissures of known diameter. This is done with milling cutters with a known diameter of approx. 1.
0mm diameter. Doctors ensure sufficient bite reduction by combining the grooves.
This step is repeated on all surfaces of the tooth to ensure an even reduction.
During preparation, the sharp corners of the lines should be removed.
Margins should be carefully prepared with a 1 mm wide circumferential shoulder or bevel with rounded axial/gingival corners.
Take care around To create undercuts at the junction of the shoulder and axial walls.
Sharp edges and sharp transitions should be avoided and the shoulder should be as smooth as possible. This can be done with a fine-grain diamond drill.
The soccer drill can be used to reduce and contour the lingual surfaces.
Our licensed and skilled technicians are constantly to be had for case consultations and might help you with case planning. Get in touch now.
Dental crowns and bridges are varieties of dentistry used to restore broken enamel or update enamel which have been misplaced secondary to caries, trauma, periodontal disease, etc. For sufferers, regaining feature and enhancing aesthetics are regularly stipulations for dental implant remedy. Throughout the final fifty years, substances used for dental implants had been appreciably researched, and an know-how of the way the bodily and chemical residences have an effect on the scientific final results of the remedy has significantly improved.
These residences encompass the floor composition and the microstructure of dental implants. Ideally, implant substances ought to be biocompatible and immune to corrosion and fracture. Implants may be crafted from titanium or zirconia (ceramic).
At Ms Dental Arts Lab, the cloth we propose for crown restorations will depend upon numerous factors, which include which teeth the crown will restore, the presence or absence of parafunctional habits, and steel hypersensitive reactions. Before deciding on the cloth for crowns or constant prostheses, it’s crucial to speak about the advantages and obstacles of every choice.

Titanium has been used to make dental implants for decades. It has extensively appeared as the “gold popular of implants.”
Commercially natural titanium is represented via way of means of 4 awesome grades, specially grade 1, grade 2, grade 3, and 4. Pure titanium degrees from grade 1, which has the best corrosion resistance, formability, and lowest power, to grade 4, which gives the best power and slight formability.
Titanium alloys are metals that incorporate a aggregate of titanium and different chemical elements. For maximum applications, it’s miles alloyed with small quantities of aluminum and vanadium, normally 6% and 4%, respectively, and for a few, it is also alloyed with palladium. Such alloys have very excessive tensile power and toughness, are mild in weight, have corrosion resistance, and might resist excessive temperatures.
The warmth resistance permits a warmth remedy method after the alloy has been labored into its very last form earlier than it’s miles placed to use, permitting lots less complicated fabrication of a excessive–power product. The maximum not unusualplace titanium alloy has 6% aluminum and 4% vanadium and is warmth handled to enhance its power, ensuing in a low-density cloth this is immune to corrosion and fatigue.
Implants crafted from titanium are biocompatible; thus, whilst the steel comes in touch with the bone, the bone grows subsequent to the steel with out disruption.
There had been a few issues over titanium sensitivity, likely related to floor corrosion of implants, however maximum of the studies pertains to orthopedic implants. There is little proof to reveal hypersensitive reactions to titanium, even though a few human beings might also additionally have a sensitivity or an hypersensitivity to different metals utilized in titanium alloys. Also, a few sufferers decide on now no longer to have any shape of steel of their bodies.
High established achievement charge of 95%.
Titanium implants have established longevity.
Potential allergies in a few sufferers
Some sufferers bitch of a metal flavor withinside the mouth.

As the call suggests, porcelain fused to steel (PFM) crowns combines porcelain and steel. The porcelain overlay is color-matched to the patient’s herbal enamel. Sometimes, the darkish steel margin ought to display on the gingival margin, in particular with gingival recession or excessive smile lines. Dentists might also additionally propose PFM restorations for sufferers who choice power and a herbal appearance.
The cloth is durable.
Matching a patient’s teeth coloring to PFM restorations can be incredibly easy.
PFM restorations incorporate numerous styles of metals, which could purpose allergies in a few sufferers.
The steel across the margins of PFM crowns can come to be seen on the gingival margin, that is taken into consideration unappealing for a few sufferers.
Zirconia dental implants are ceramic dental implants; they may be now no longer steel. They might also additionally wreck greater without problems than titanium implants. Zirconia, a steel withinside the periodic desk of elements, is located worldwide. Everyday family objects which include dinnerware, pipes, and electric furnishings are crafted from zirconia.
Because of its herbal power and durability, zirconia is good for dental crowns. Zirconia crowns are first-class for sufferers who want posterior crowns, which require lots power for masticating meals and parafunctional habits.
Is well suited with human tissues
Implants have a low bacterial attraction
Have excessive power and respectable fracture resistance
They maintain up properly concerning put on and corrosion
Have splendid esthetics (no steel margins)
Over time, the cloth might also additionally go to pot and result in microfractures. Implants are normally handiest to be had in one-piece implants; titanium implants are a higher choice if attitude correction is needed.
Grinding zirconia can lower its fracture resistance.
Although proof is limited, zirconia implants might also additionally have better failure costs whilst in comparison to titanium implants.
Less scientific studies has been performed on zirconia implants than titanium and PFM restorations.
Implant-supported zirconia crowns may be greater costly.
The professional technicians at MS Dental arts Lab have in-intensity information approximately zirconia, titanium, and PFM substances used for restorations and are continually inclined to speak about unique instances with you.


A top-notch dental imprint is essential because without one, the dental lab cannot create precise, well-fitting restorations. Potential dental impression mistakes should be found before sending the impression to the lab. Otherwise, if the impression is turned down, work can be delayed.
If the project moves forward, there is a higher chance that you will need to spend valuable chairside time correcting it or that it will need to be completely redone.
The chosen tray must accurately record the required data without distortion. All of the teeth should be covered by it, but it shouldn’t touch the soft tissues. After making an impression, the tray shouldn’t be visible.
Full arch trays come in a variety of sizes. Trays’ arch shapes vary depending on the manufacturer, with some being more square and others being more rounded. Make sure the tray you choose is long enough to encompass the entire arch and wide enough to accommodate the tray comfortably. Metal trays can be altered and their posterior parts can be widened, but altering the anterior part of metal trays is more difficult. An alcohol torch can be used to heat plastic trays and modify them.
It’s best to keep a variety of dual-arch trays (triple trays) in stock because they come in different widths. As the patient bites into the empty tray to determine the size of a dual-arch tray, look at the other side of the arch. You’ll have a clear notion of how the occlusion ought to appear while capturing the impression thanks to this. Additionally, it enables the patient to feel what is required of them and will guarantee that they bite properly when taking the impression. Due to the fact that wax bites are frequently less stable during transportation, it is beneficial to offer a separate occlusal registration using rigid vinyl polysiloxane (VPS) material.
When imprint material is properly blended, the colour is smooth and streak-free. With hand-mixed putty materials, streaking is more likely to occur, so hand-mixed ingredients should be promptly kneaded to ensure consistent colour. When using cartridge materials, bleed the cartridge before affixing the automix tip. This will guarantee that the catalyst and the base flow uniformly, preventing mixing problems. Since the tray material and wash are chemically formulated to cooperate, it is essential to use products from the same manufacturer. When the impression is poured up in the dental lab, using different materials could increase the chance that the wash material will separate from the tray VPS.
An imprint material layer that is sticky and unset might result from surface contamination. It can be because adhesives, composites, or core build-up materials left a greasy film on the tooth preparation. Any of these could stop the material from properly setting. Retraction cables and solutions containing ferric sulphate or aluminium chloride can deliver sulphur to vulnerable regions, preventing the marginal VPS material’s setting reaction. The same effect can be achieved through glove contact, rolling the retraction cord in gloved fingers, or using a rubber dam. When putty is mixed by hand, latex can get into it.
After removing the rubber dam, properly dry the area and rinse it with water or mouthwash to prevent surface contamination. Make sure to thoroughly wash the preparation after applying hemostatic agents to get rid of any remaining debris and hemostatic agent. Additional hemostatic can be burnished into the gingival sulcus to stop further bleeding if gingival bleeding resumes. The preparation is air-dried and prepared for an impression once the bleeding has ceased. If the putty is mixed by hand, wash your hands while wearing gloves to get rid of any remaining surface powder and sulfides. If not, pick vinyl or powder-free gloves.
One of the most important features of a dental impression is the margin. Without a precise marginal impression, issues like overhanging or open margins or a restoration that doesn’t fit properly are more possible. Inadequate retraction or areas where fluid has gathered restrict the impression material from flowing around the margin, which is the usual cause of voids at the margin.
The best method to deal with this issue is to use retraction cords with syringeable hemostatics. Utilizing a double retraction cord is one method. Another method involves preparing the gingival sulcus and inserting retraction pastes there. When achieving hemostasis, a diode laser can help widen the sulcus and enhance visibility of the prepared margin.
Bubbles may appear in the imprint if moisture, such as blood, water, or saliva, becomes entrapped in the impression substance. These bubbles might impact the luting agent and increase the amount of space that needs to be filled. The interaction between the restoration and the tooth is weaker when the luting substance is thicker. Additionally, if the prosthetic material is too thin, there is a greater chance it may fail; this is crucial when utilising all-ceramic materials, in which case a minimum thickness is essential. Hemostasis is the key to resolving this issue.
When the wash material lacks sufficient tear strength, marginal tears may happen. Low viscosity material is more likely to tear in the sulcus and varies in strength according on the manufacturer. The wash material is thinner and more likely to tear when being removed when the sulcus is extremely deep. Additionally, if the impression is taken out before the wash material is set, there may be some minor ripping. If you need to rebuild an impression due to minimal tearing, make sure any leftovers are taken out of the sulcus and think about pulling back more tissue to make the sulcus wider. Additionally, using a more viscous wash substance could enhance the impression’s quality.
For the impression to be precise and predictable, the best impression material must be used. For your patient’s comfort, a sort setting time is typically preferred; nonetheless, it is crucial to understand the working time for the substance you have selected. The working time must be used to insert the impression. If it is already set up, it might not seat all the way and won’t record the necessary information. Selecting a material that is more hydrophilic will make it easier for it to adhere to the prepared tooth, particularly sub-gingivally and where fluid may be present.
It is essential to take your time and double-check the facts (for example, packing the retraction cord). Make that the cable is properly packed and that the tissue has been sufficiently retracted. Rushing could prevent the chord from having enough time to sit, which would just serve to traumatise the area surrounding the sulcus.
If the patient moves or starts to gag, dental impressions may get distorted. Engaging in conversation with the patient can assist keep them motionless by keeping them busy and preventing them from noticing any pain. Remind the patient to breathe in and out through their nostrils frequently. They can ease their discomfort by wriggling their toes.
If you have any questions, our knowledgeable technical team can provide guidance on obtaining more consistent and high-quality impressions.
To arrange a meeting with our technical team, click here.
By Sarfraz Ahmed.
When a patient loses one or more teeth, they will want to get them replaced as soon as possible. A good remedy is frequently provided by dental implants. Many dentists provide same-day dental implants, which are placed and nearly instantly loaded utilising cutting-edge procedures. The implants must be positioned for this treatment in a way that prevents movement as the body heals. Even if fresh restorations are put onto the implants right away after surgery, they still need to integrate with the bone; even the tiniest movement could prevent this.
Same-day, implant-supported bridges effectively seal the implants into place, preventing any movement. The implant-supported crown is made in such a way that it cannot come into contact with the opposing dentition when this method is used to restore a single tooth. Same-day procedures can involve the use of small-diameter implants, or SDIs. When adopting flap-less surgery procedures, small-diameter implants are frequently employed for implant-supported dentures.
Even while this course of action may seem perfect, it has certain disadvantages. But first, let’s examine the benefits.
If the procedure is effective, patients will experience a high degree of patient satisfaction since they will be able to get their new teeth and have their implant surgery all on the same day. Same-day dental implants eliminate the need for patients to wear an unpleasant partial or full denture while their implants recover. People who hate losing their teeth for any period of time find treatment to be very enticing. During the healing process, patients can eat and converse in a comfortable manner with little disruption to daily life. The procedures used for same-day dental implants have undergone extensive testing and will not jeopardise the course of treatment’s long-term success.
All-on-Four® Treatment idea is one of the most widely used same-day dental implant methods. This is when a full arch of teeth is supported by just four dental implants, and the forces applied to the implants are frequently directed at an acute angle. Bone grafting is typically not required with this surgery since the placement of the dental implants maximises the utilisation of the bone that is already there, particularly in locations where it is naturally thicker. This can lower expenditures for patients without lowering the standard of the outcomes.
No shortcut can be made to the bone-to-implant integration process by same-day dental implant procedures. The body needs time to produce new bone cells that firmly hold the implants, so this still needs to happen and cannot be rushed. Compliance from the patient is essential to preventing movement of the dental implants during the healing process, which can take three to six months. Patients must frequently adhere to a softer diet during this period, avoiding foods that are especially tough or crunchy, like carrots or almonds. After surgery, this may persist for 6 to 8 weeks. Failure to follow a softer diet could result in the implants moving, which would harm integration and raise the possibility of treatment failure.
disadvantages of same-day dental implants
It is not possible to short-circuit the bone-to-implant integration process with same-day dental implant procedures. This still needs to happen and can’t be expedited because the body requires time to create fresh bone cells that firmly anchor the implants. For the dental implants to stay put during the healing process, which might take three to six months, patient compliance is essential. Patients must frequently adhere to a milder diet during this period, staying away from extremely crunchy or hard items like carrots or almonds. Following surgery, this could persist for 6 to 8 weeks. The implants could move if you don’t follow a softer diet, which would harm integration and raise your likelihood of treatment failure.
Please remember that our knowledgeable technical team will help you if you want to talk about a case in more detail.
To arrange a meeting with our technical team, click here.

