At MS Dental Arts, we believe that dentistry is more than science—it’s an art. Every crown we craft isn’t just a piece of ceramic; it’s a reflection of care, precision, and the trust placed in us by dentists and patients alike. Behind every restoration lies a story—of a smile restored, confidence rebuilt, and life transformed.
From a Scan to a Smile
Our process begins with understanding. When a digital impression or traditional mold reaches our lab, it marks the beginning of a meticulous journey. Every crown we create is tailored with exacting detail using state-of-the-art CAD/CAM technology combined with the skilled hands of our experienced technicians.
More Than Materials – It’s About Meaning
Whether it’s a single-unit zirconia crown, an e.max onlay, or a full arch bridge, we don’t just see it as a case—we see a person. A wedding coming up, a job interview ahead, or just the desire to smile without hesitation. These are the real reasons we go the extra mile for every restoration.
A Fusion of Art and Accuracy.
At MS Dental Arts, beauty and function are never compromised. Our crowns are not only durable and precisely fitting—they’re also lifelike in shade, shape, and translucency. That’s where our artistic edge comes in. We recreate nature, one tooth at a time.
Collaboration is Key
We work closely with dental clinics and professionals to ensure every crown meets exact clinical requirements. Our communication is clear, our timelines are fast, and our results speak for themselves. Your trust drives our perfection.
Every Crown Has a Story. We Help You Tell It.
A crown might be small, but its impact is massive. It completes a smile, boosts confidence, and improves lives. At MS Dental Arts, we’re proud to be part of that journey.
Digital Dentistry & Modern Dental Laboratory: The Impact
Digital dentistry has revolutionized the dental laboratory industry, introducing new technologies and processes that enhance efficiency and accuracy. At MS Dental Lab, we embrace these advancements to provide superior dental restorations. This article explores the impact of digital dentistry and its benefits for dental professionals and patients alike.
Key Technologies:
Intraoral Scanners: Our lab uses advanced intraoral scanners to capture precise digital impressions of patients' teeth, eliminating the need for traditional molds and improving patient comfort.
CAD/CAM Systems: Computer-aided design and manufacturing enable us to create highly accurate dental restorations quickly and efficiently.
DMLS/3D Printing: This technology allows for the production of custom dental prosthetics with unparalleled precision, reducing turnaround times and enhancing the fit and function of restorations.
Benefits for Dental Labs:
Increased Efficiency: Digital workflows streamline the design and manufacturing process, reducing turnaround times for dental restorations.
Enhanced Accuracy: Digital impressions and CAD/CAM systems ensure a precise fit for crowns, bridges, and other dental prosthetics.
Cost-Effective: Automation of processes reduces labor costs and material waste, leading to cost savings for dental labs.
Benefits for Patients:
Comfort: Digital impressions are less invasive and more comfortable for patients compared to traditional molds.
Speed: Faster production times mean patients receive their dental restorations more quickly.
Quality: The precision of digital dentistry results in high-quality restorations that improve patient satisfaction.
Conclusion:
Digital dentistry is transforming the dental lab industry, offering numerous benefits for both dental professionals and patients. At MS Dental Lab, we are committed to harnessing these technologies to provide exceptional dental restorations. As technology continues to advance, the future of dental restorations looks brighter than ever.
At MS Dental Arts, we are dedicated to providing our patients with the latest advancements in dental technology. One of the most exciting developments in restorative dentistry is the DMLS crown. Direct Metal Laser Sintering (DMLS) crowns offer a cutting-edge solution for patients seeking durable, precise, and aesthetically pleasing dental restorations. In this blog post, we’ll explore what makes DMLS crowns a superior choice for your dental needs.
By Sarfraz Ahmed
What is a DMLS Crown?
DMLS stands for Direct Metal Laser Sintering, a revolutionary technology that utilizes a high-powered laser to fuse metal powder into a solid structure layer by layer. This process allows for the creation of highly accurate and intricate dental crowns, tailored to fit each patient’s unique dental anatomy.
Benefits of DMLS Crowns
Exceptional Precision and Fit: The laser sintering process ensures that DMLS crowns are crafted with unparalleled precision. This results in a perfect fit, reducing the need for adjustments and ensuring optimal comfort for the patient.
Durability and Strength: Made from high-quality metal alloys, DMLS crowns are incredibly strong and durable. They can withstand the daily wear and tear of chewing and speaking, making them a long-lasting solution for dental restorations.
Biocompatibility: The materials used in DMLS crowns are biocompatible, minimizing the risk of allergic reactions or adverse effects. This makes them a safe choice for patients with sensitivities to certain metals.
Superior Aesthetics: DMLS crowns can be coated with porcelain or other materials to match the color and appearance of natural teeth. This ensures that the restoration not only functions well but also looks great, blending seamlessly with the rest of your smile.
Efficient Production: The digital design and manufacturing process of DMLS crowns allow for quicker turnaround times. This means you can receive your custom crown faster, reducing the number of visits to the dentist.
The DMLS Crown Process at MS Dental Arts.
At MS Dental Arts, we prioritize patient satisfaction and use advanced technology to deliver the best possible results. Here’s what you can expect when getting a DMLS crown:
Consultation and Examination: Our experienced dentists will conduct a thorough examination to determine if a DMLS crown is the right solution for your dental needs. We will discuss your expectations and answer any questions you may have.
Digital Scanning: Using state-of-the-art digital scanning technology, we will create a precise 3D model of your teeth. This digital impression eliminates the need for traditional molds and provides a more accurate representation of your dental structure.
Crown Design: Our skilled dental technicians will design your crown using advanced CAD software, ensuring a perfect fit and natural appearance.
Manufacturing: The DMLS crown is manufactured using the direct metal laser sintering process. This high-tech method ensures the highest level of accuracy and quality.
Fitting and Adjustment: Once the crown is ready, you will return to our office for fitting. Our dentists will ensure the crown fits perfectly and make any necessary adjustments to guarantee your comfort and satisfaction.
Final Placement: The final step is the placement of the crown. Our team will securely bond the crown to your tooth, giving you a beautiful, functional restoration.
Why Choose MS Dental Arts for Your DMLS Crown?
At MS Dental Arts, we are committed to excellence in dental care. Our team of highly trained professionals uses the latest technology and techniques to provide our patients with the best possible outcomes. We believe that every patient deserves a smile they can be proud of, and our DMLS crowns are a testament to that commitment.
Ready to experience the benefits of DMLS crowns for yourself? Contact MS Dental Arts today to schedule your consultation and take the first step toward a healthier, more beautiful smile.
Although dental implants are an increasingly popular means of tooth restoration for patients with complete edentulism, not everyone is ready or suited for this procedure. Traditional dentures always provide a predictable result or may be required to help patients transition from dentures to implant-supported dentures.
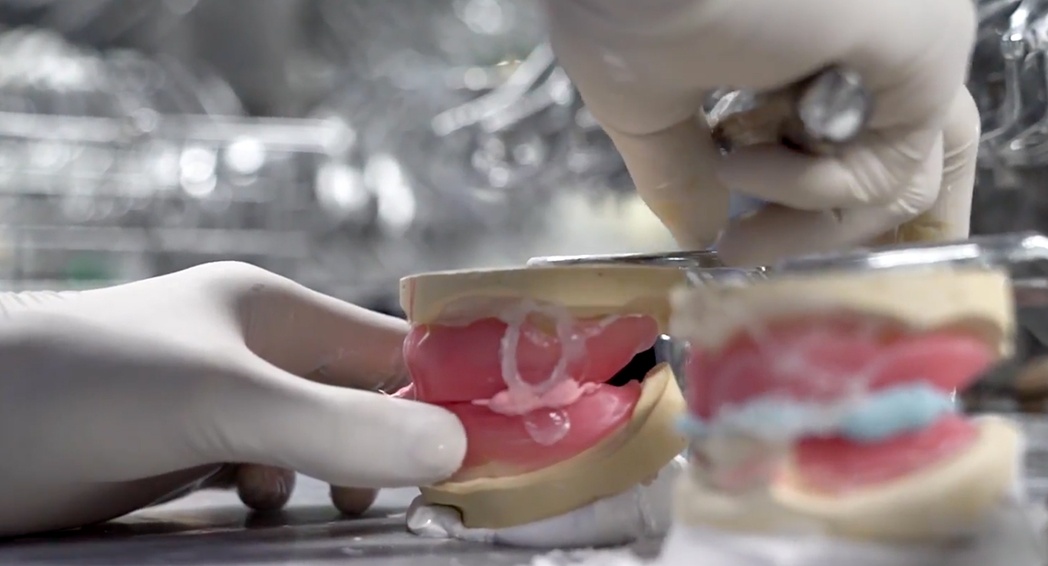
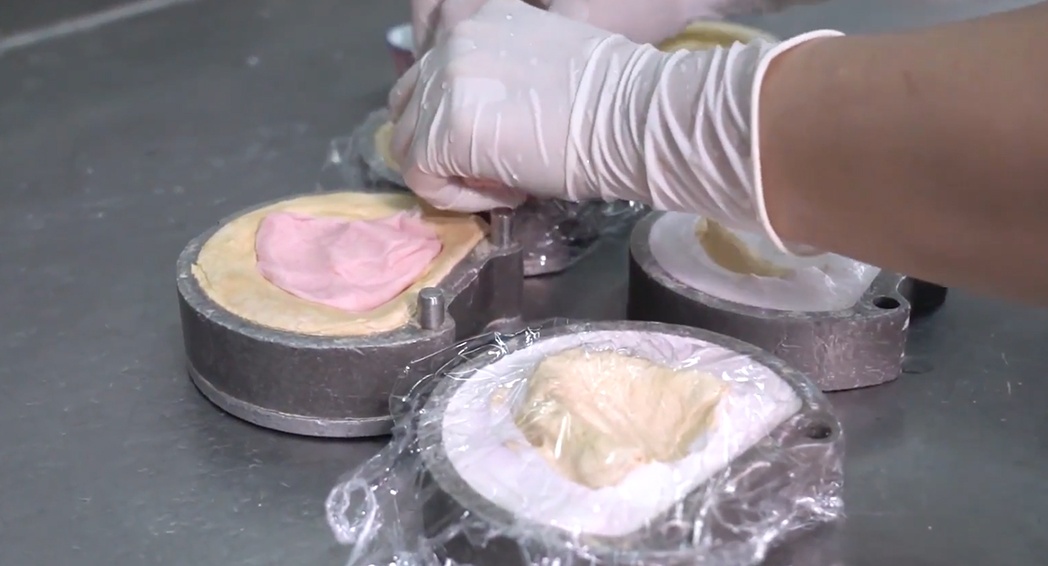
1. Pouring the Model
First take a first impression of the patient’s mouth with tablespoons for edentulous patients. It may be necessary to reinforce the circumference of the spoon with wax.
Take an impression of the tartar with a vibrator to remove bubbles and cavities.
2. Fabricating the custom tray and bite rim
Your lab technician will fabricate a custom tray and occlusal wax margin The occlusal margins should be contoured to provide adequate labial support and to accommodate the future incisal position, occlusal plate, the vertical dimension and the center line. Select the most appropriate tooth mode and tooth shade for your patient, record these details and other information on your x-ray and send all parts back to the dental laboratory.
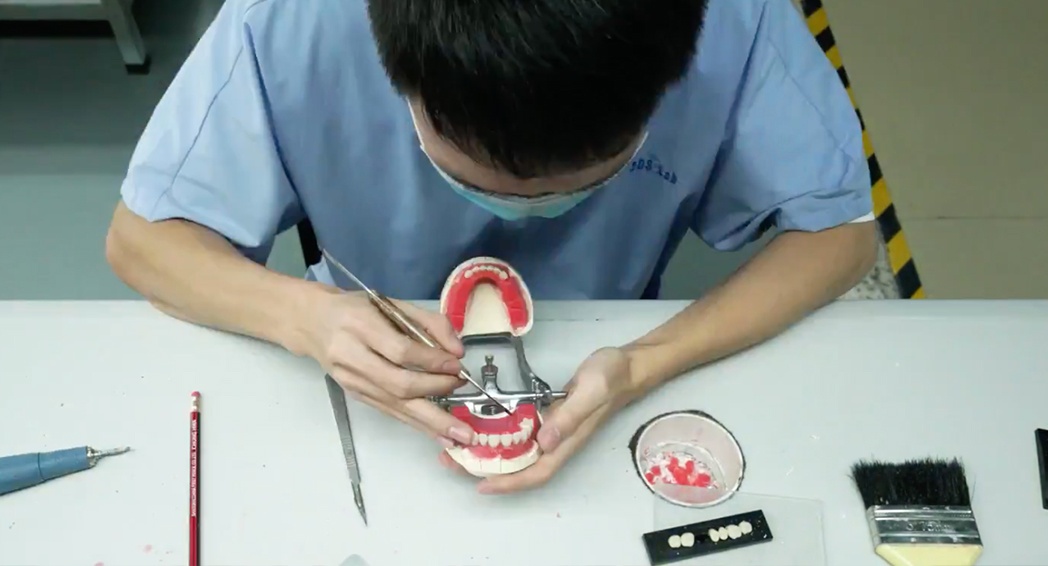
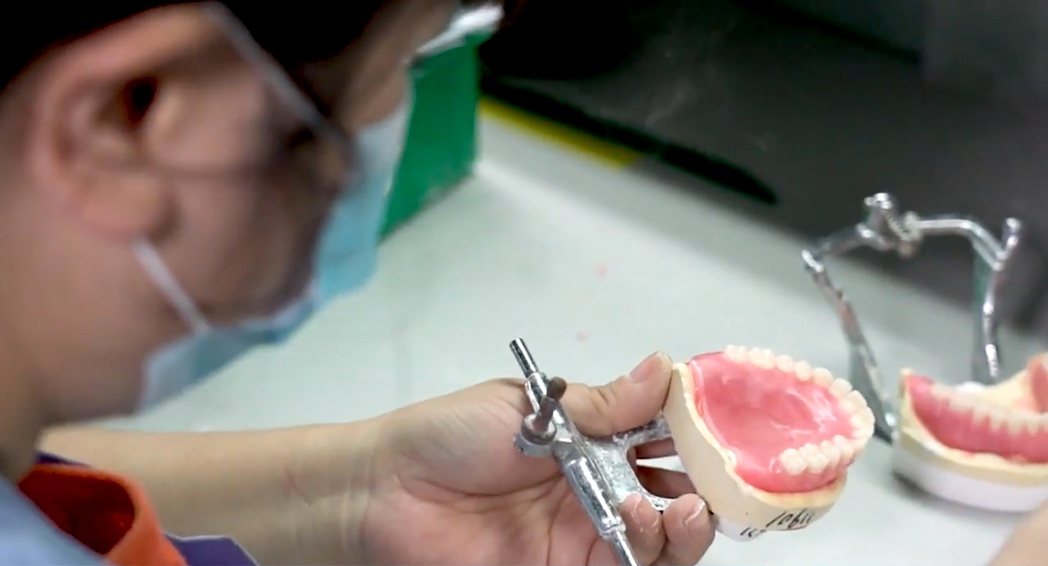
3. Articulating the models
Dental indexes and fixes master models created from an individual tray impression and occlusal measurements by the articulator to represent the patient’s jaw relationship.
4. Setting Up the Teeth
Your dental technician positions the teeth according to the desired occlusal pattern. Ensure proper form and function.
5. Waxing
Once all teeth are properly aligned, the dental technician will apply additional wax around the teeth, gradually building up the correct gum line. Sufficient wax is added to properly support the gums of the facial muscles and give them a natural look. The wax can be slightly perforated to prevent the acrylic gum from feeling abnormally smooth after the denture is made.
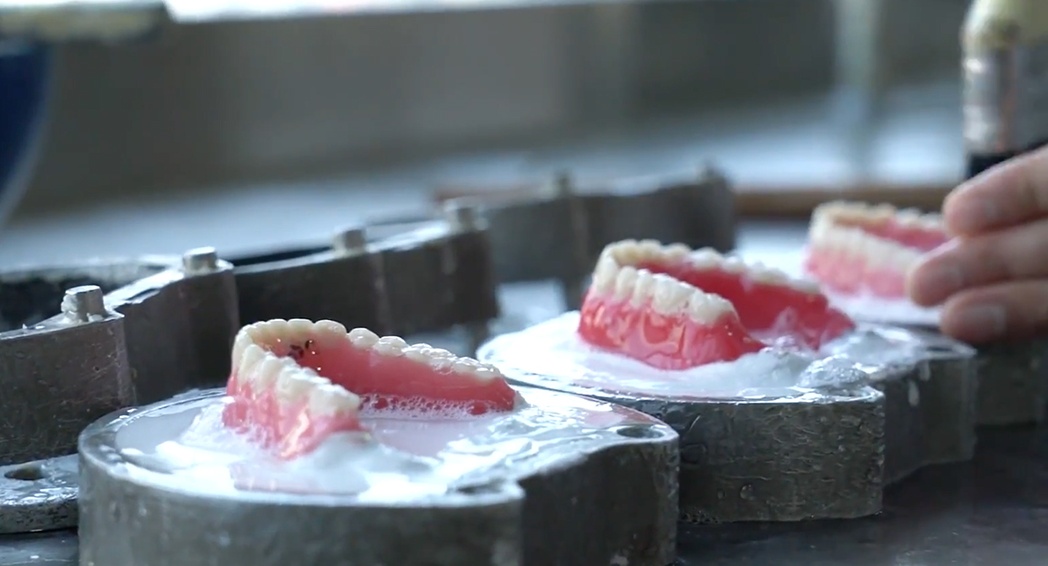
6. Flasking
Once both the dentist and patient have accepted the dental adjustments, the denture is ready for treatment. The first step is to cast the prosthesis by placing the model with the prosthesis in the lower ampoule and fixing it with plaster. After the plaster has dried, the upper balloon is put on and filled with more plaster. The flask is then heated until the wax is sufficiently melted. Then the bottle is opened, the wax is thoroughly rinsed out and the teeth and the denture mold are filled with acrylic.
7. Acrylic Mixing
The technician carefully weighs the monomer and polymer. He carefully mixes them to make the acrylic.
8. Acrylic Pressing
Once the mold is prepared, the acrylic is packed into the bottle and the two halves are rejoined.
The prosthesis is then polymerized under pressure until it is sufficiently hard. The prosthesis is rinsed, plaster-free and ready for finishing.
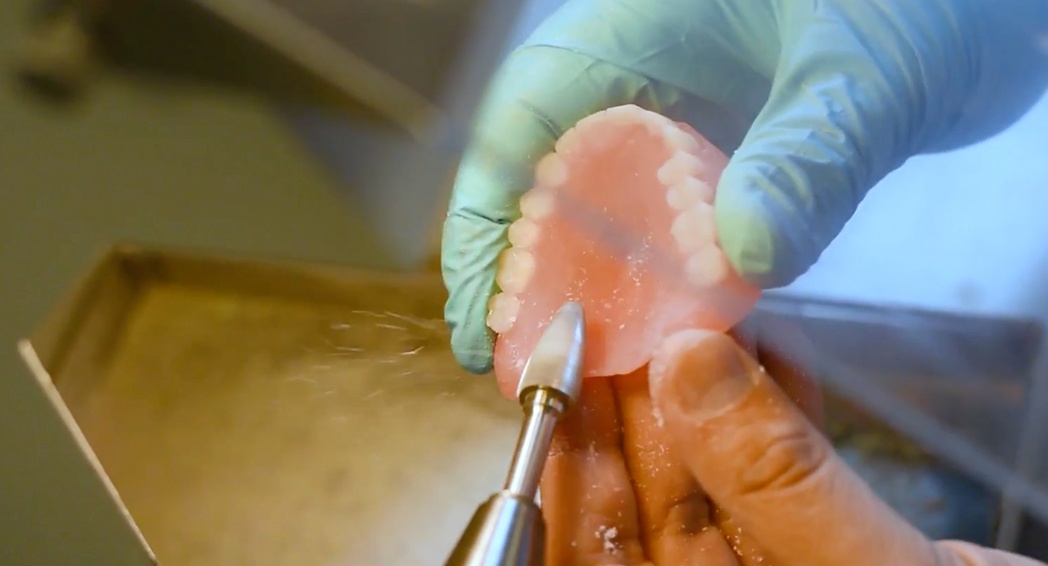
9. Finishing
Each prosthesis is finished by hand using special burs to remove excess acrylic around the edges and in the area of the building. The joint is checked and adjusted if necessary.
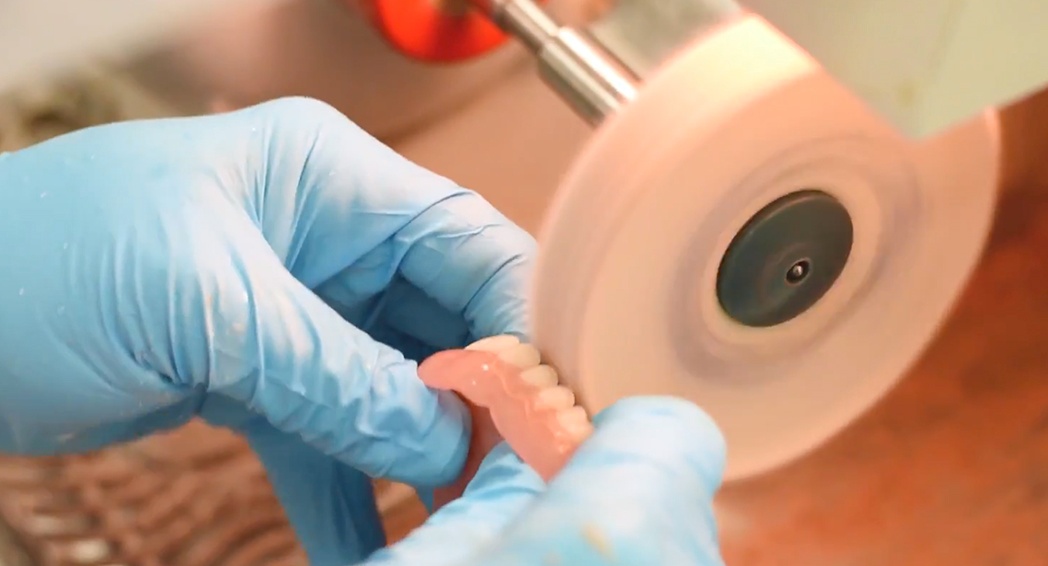
10. Polishing
Finally, the prosthesis is polished and smoothed with a mop and polishing paste. For natural luminosity.
Our licensed and skilled technicians are constantly to be had for case consultations and might help you with case planning. Get in touch now.
It is impossible to achieve well-fitting restorations without clearly defined margins. Making sure the margins are prepared and designed correctly is essential.
outstanding ending bursts
For shoulder preparations, fine finishing burs should be used; for axial and occlusal reductions, coarse diamond burs should be used. In general, rougher surfaces improve cement retention and adherence.
Dental BurImage, from left to right, bevels, chamfer margination, and coarse for axial and occlusal reduction.
To help physicians purchase diamond burs for all clinical needs, manufacturers offer bur kits.
The kind of crown restoration, the material, and the location will all influence your choice of margin preparation (aesthetics, periodontal). The following lists the many sorts of margins and when to utilise them.
varieties of margins
1.Margin styles with a knife edge or a feather edge work well for:
Knife-edge or feather-edge margins require less tooth reduction than other types. For multilayer zirconia restorations, this preparatory design is inappropriate and may result in fitting or fracture problems.
A 360-degree chamfer margin is appropriate for PFM, all-ceramic, and full-cast crowns.
When compared to knife-edged margins, bevel-chamfer margins give better marginal fit. When making crowns out of layered zirconia or IPS e.max®, this margin preparation is not ideal.
The marginal fit between the restoration and the tooth surface is improved by chamfer margins. For multilayer zirconia and IPS e.max restorations, they are less appropriate.
4.It’s acceptable to use shoulder or butt-joint margins for:
The shape of the bur at the apical end determines the margins.
Shoulder-beveled margins minimise potential dark lines at the margin and offer a passive fit. LiS2 and layered zirconia are excellent materials for this preparation. Gingival retraction prior to preparation and the use of end-cutting burs can help ensure proper isolation of the margin during preparation.
Generally speaking, shoulder-bevel margins produce precise marginal adaptation and clinically acceptable marginal fit. Metal collars may be seen, hence they shouldn’t be utilised in situations where aesthetics are an issue. They are not the best option for zirconia crowns that are stacked.
For well-fitting crowns, it’s essential to isolate the preparation margins. Additionally required are gingival healthy tissues, which reduces the risk of blood contaminating the scan or impression. There is a considerable likelihood that the Quality Control person will reject the case if your dental laboratory technician cannot perceive the margins of a traditional impression or if a digital scanner fails to record the margins adequately.
It is unacceptable to move forward with scans or impressions that are subpar. In the event that the case proceeds, there will probably be open or short margins, necessitating a new impression or scan in order to finish the case.
Data can be recorded and shown using digital technology, giving researchers the chance to examine minute characteristics that are difficult to see on traditional fixed prosthodontic impressions. However, conventional rules still hold true because the margins must be distinct and obvious.
How to Get a Great Margin Scan on Your iOS
Digital impressions can produce precise images, but there are a number of critical things to take into account.
Tissues are ready for retraction after preparations with 0.5mm subgingival margins were finished.
Accurate sub-marginal line of sight acquisition
The image that will be captured by the scanner is the one that is seen in the mirror. The tooth structure should be visible 0.5 mm apical to the edges. Digital imprints that have been poorly managed for tissue and moisture are regularly sent to dental labs. The margins must be readable and distinct.
Digital scanners only record the structures that are visible on the teeth, just like traditional imprints. You must be able to see the tooth structure from the apex to the edges when using your digital impression procedures.
Bringing Soft Tissue Back
Ø Packing cords into the sulcus before producing impressions is the greatest way to retract soft tissue.
Ø The size, shape, and depth of sulci vary.
Ø Retraction cables are offered in a variety of materials and sizes.
Ø In most cases, packaging doesn’t cause braided cords to unravel.
Ø Sulci typically start off narrower at the apex and gradually get wider as they approach the gingival crest. The majority of sulci have a V-shaped cross section.
Ø Therefore, if necessary, the thinner cords should be positioned first (000), then a thicker cord (00), and ultimately the thickest cord (0).
Ø The interproximal areas, where the sulcus depths are normally deeper, are where clinicians usually begin. During these processes, the least amount of pressure should be created.
The preparation is frequently at least somewhat apical to the free gingival edge. To get accurate scans or impressions, the tissue around any subgingival borders on the tooth preparation must be cut away. With exceptional quality retraction that displays clear margins, high-clarity scans can be produced.
It can be difficult to isolate the boundaries of inflamed gingival tissues due to continuous bleeding. It is crucial that there is no active bleeding present during scans or impressions, as well as no saliva.
Although teeth that are being prepared for crowns frequently had teeth that were previously treated with sub-gingival margins, supragingival margins allow a clear visibility of margins. The gingival tissues’ health has frequently been harmed in these situations.
Retraction cord usage
Cords for dental retraction
Gingival tissue is moved laterally away from the margin preparations by the retraction cord. Utilizing a thin packing device, it is delicately inserted into the sulcus. Retraction cord is an efficient way to remove gingival sulcular tissues.
However, haemorrhage could also result from it. There are hemostatic treatments that can be applied to the cords or the bleeding areas prior to the impressions or scans. Prior to continuing, bleeding must be stopped.
Retraction cords come in a variety of diameters, materials, and producers.
Double-Cord Method
Using numerous cords can improve tissue displacement and make it easier to capture margins. Using two cables prevents tissue from folding over the edges during scanning or imprints if the patient has a particularly deep sulcus.
Pack a cord with a smaller diameter first while bundling the cords. In most cases, the first chord will cover the edges. Next, stuff a cord with a bigger diameter; this usually reveals the margins.
To fully expose all edges, it could occasionally be necessary to use a third cord with a bigger diameter. Before being removed, the larger cables must remain in place for at least five minutes. Occasionally, the original, thinner chord is still present during the scan or impression.
exposing edges using a soft tissue laser and retraction paste
By removing unhealthy and inflamed gingival tissue that may be obscuring the subgingival margins or causing excessive bleeding, a soft tissue laser can help reveal the subgingival margins. Lasers have the potential to permanently alter gingival tissues, so extreme caution must be taken.
Ø The rebuilding of healthier tissues is aided by the removal of inflammatory tissue.
Ø Hydrogen peroxide solution eliminates tissue debris after areas have been treated with a dental laser.
Ø After being injected into the sulcus, the paste is covered with a sturdy cotton roll.
Ø The paste is rinsed away, allowing a clear view of the margins as the patient chews down on the cotton for two to five minutes.
Whether using a traditional or digital impression, the proper margin preparation and tissue management techniques are essential for producing and fitting high-quality restorations. A great chart from MS Dental Arts Lab can help you increase your margins. You can download this chart, which is a useful resource.
Our trained and knowledgeable technicians can help you with case preparation and are always accessible for case consultations.